Recently I was asked by my friend, Emily (via Robert!), to create a small artwork out of a matchbox to be auctioned off at a Matchbox Gala, benefiting Naropa Community Art Studio – International. NCAS-I is an organization created to provide art therapy to those in need, around the world. They are currently getting ready to travel to Cambodia to help survivors of sex-trafficking. This project sounded right up my alley, so I gladly agreed!
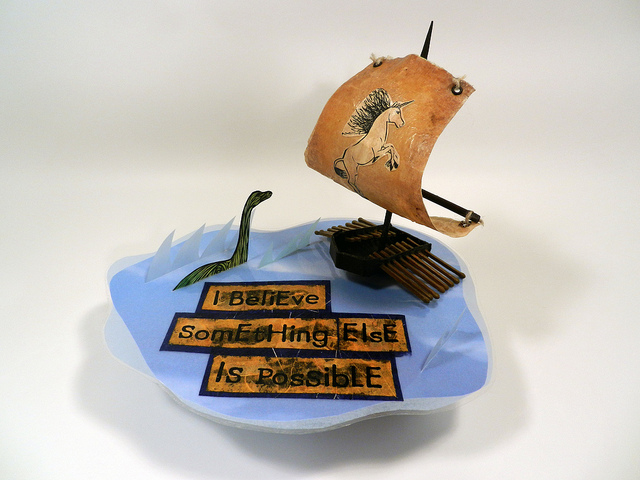
Here is my finished matchbox creation:
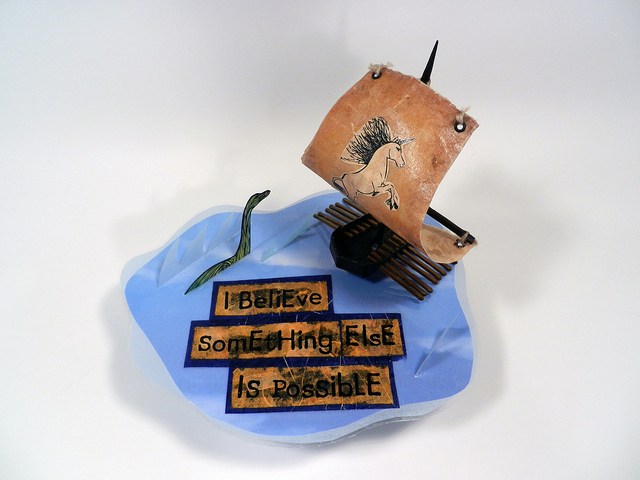
Oh…holy cow! I mean, it’s pretty great. It’s got a viking ship AND a Champy. I mean, come on, isn’t it the bomb?! I am very happy with the way it turned out! I am also a little frightened to mail it off to Boulder for the gala! You can find out all the steps I took to make this by reading below, complete with pictures!
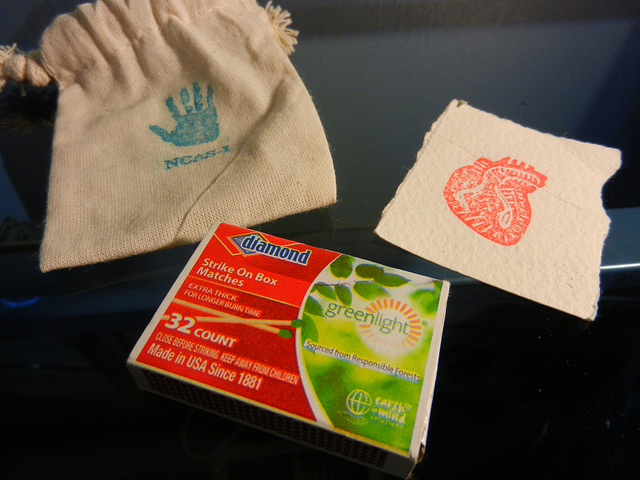
I was provided a matchbox to use. It came in the mail in a cute little bag with a stamped card:
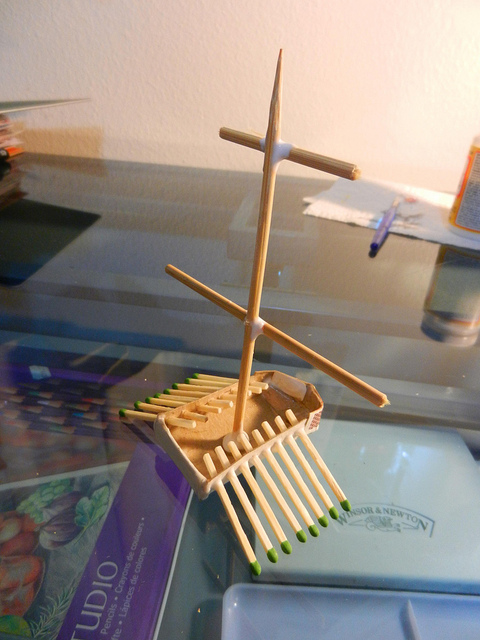
I immediately had an awesome idea! I knew right away that I wanted to make the matchbox into a viking ship, using the matches as the oars that stick out from the ship’s body through holes in its side. After a little bit of careful deconstruction, cutting, and reconstruction, I had my ship’s body and oars:
The next step was painting the ship and making the sail. But, I had to wait for the glue to dry first. The hardest part of this whole operation, was waiting for the glue to dry. I just wanted to keep going! I used my hair dryer to speed up the drying process, but it still took quite a bit of time. I painted the ship’s body dark brown, and them mixed a lighter yellow/green/brown for the oars.

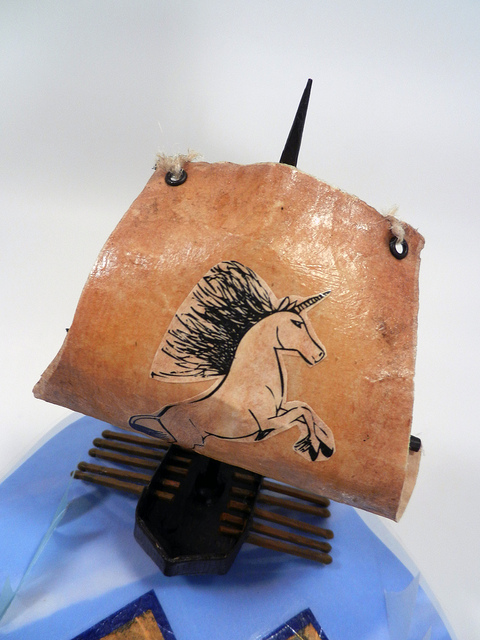
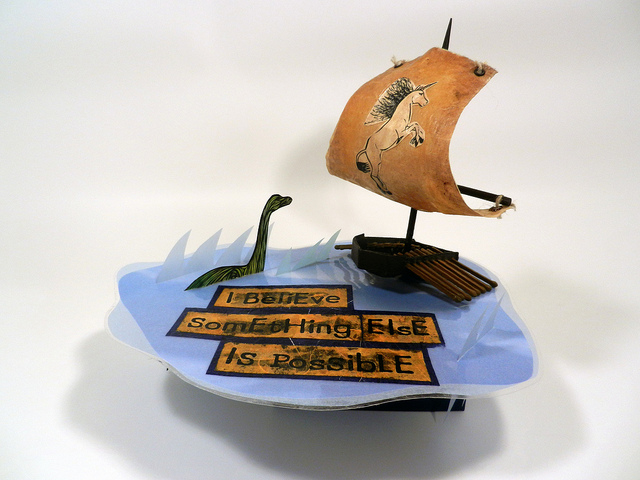
You can see a sneak peek of the sail above. The sail was a fun little project. I looked through my paper stash and found a light brown, thin paper, similar to the brown paper towels you find in public bathrooms. I cut out the shape of the sail, and used a bit of watercolor to add some darker tones around the edge of the sail. Then, I covered it all in Mod Podge to make it sturdier and give it an aged finish. The sail looked good, but it looked a bit plain to me. I figured it needed a sigil (don’t we all?). I know fewer magical creatures more badass than a unicorn, so unicorn it was! I also knew I had a previous drawing of a unicorn from one of my art calendars I could use. I used Photoshop to grab the outline of the unicorn, printed it out, painted it, and used Mod Podge to add it to the sail. I am very happy with the way the sail came out:
You can see I used a few metal brads in the sail’s corners to make nice holes I could use to tie the sail onto the mast. I used some twine to tie the sail onto the mast and then reinforced it with Mod Podge. I also added some more twine to the mast joins for decoration:

The mast was made out of a kebab skewer that I found in one of our kitchen drawers. (Isn’t it the most beautiful ship you have ever seen with a kebab?)
I feel like the ship would have been a great finished project on its own, but I couldn’t stop there. Why? Because, another thing I was DEAD SET on from the beginning, is including a Champy! (If you are not familiar with Champy, please read about him here. I grew up in Champy’s hood.) In order to have a Champy in the piece, there has to be a body of water. I cut out the shape for the sea from a piece of blue vellum, and also a blue paper printed with a photographic cloud scape. I laminated it using a sheet of self-seal laminating plastic from the office store, and BAM! instant sea! You can see it nicely in the photo above.
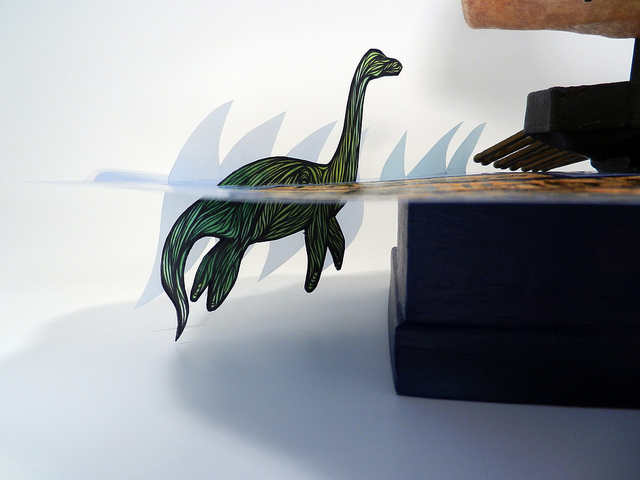
To create Champy, I printed out two small images of my swirly drawing of Champy on art paper. The two images mirrored each other. Then, I cut both Champys out, and glued them together, so his image would be on both sides. Now it was time to put it all together:

I wanted Champy to look like he was swimming in the water. So, I used my knife and cut a slot in the sea that he could fit through. You can barely see the slit I cut in the above picture. It is in the sea right above Champy and to the left of the ship. This was a bit nerve-wracking, because it had to be kind of precise. After I cut out the slot, I pushed Champy through and glued him there. I like how his legs and tail dangle beneath the surface:
In order for Champy to dangle like that, I needed to have a base to hold this whole thing up. I didn’t know how I was going to do that, but I knew I would figure it out, so I didn’t worry about it. I wasn’t really thinking about the base when I found a jewelry box underneath my drawing desk. It must have fallen and gotten kicked down there a while ago. I picked up the box, opened it up, turned its lid upside down, turned it’s bottom upside down, put the bottom on top of the lid and I had the perfect base for my project. Totally serendipitous. I glued the base together and painted it dark blue to match the sea. I waited until the very end to glue the sea onto the base.
By now, I was kind of ready to be done with this freaking thing, but there was more I wanted to add, so I had to power on! I had a specific message in mind for this piece, so I wanted to add some words to it, so people would easily understand what I was going for. The theme of the Matchbox Gala is Small Resources = Big Possibilities, and my piece is about possibilities. I am all about wanting everyone to be open to unlimited possibilities in their lives. Anything is possible – you can do anything! The problem is that a lot of people don’t believe it. They don’t believe anything else is possible, other than their shitty situation. Well, I believe something else is possible. So, I decided to add those words to the piece:
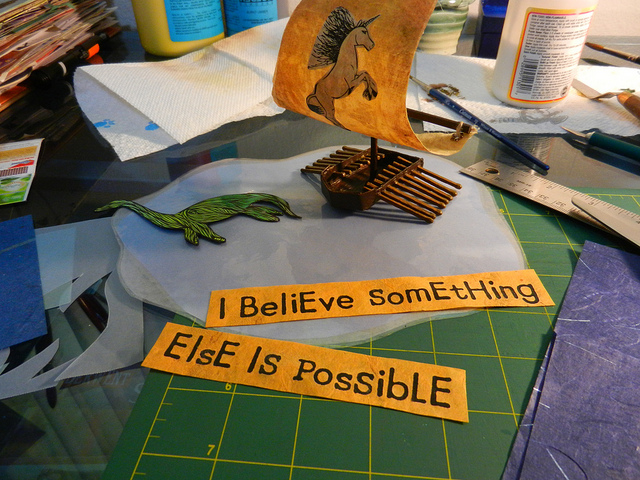
I found a couple sheets of textured paper in my stash that matched the color theme of the ship and the sea. I added the words to the orange paper using some rub-on letters. I didn’t have all of the letters I needed of the same font, so I just mixed it up. I think it looks cool! I used some dark blue textured paper to place beneath the orange paper with the words to give it depth. Then I glued the whole thing to the sea using Mod Podge:
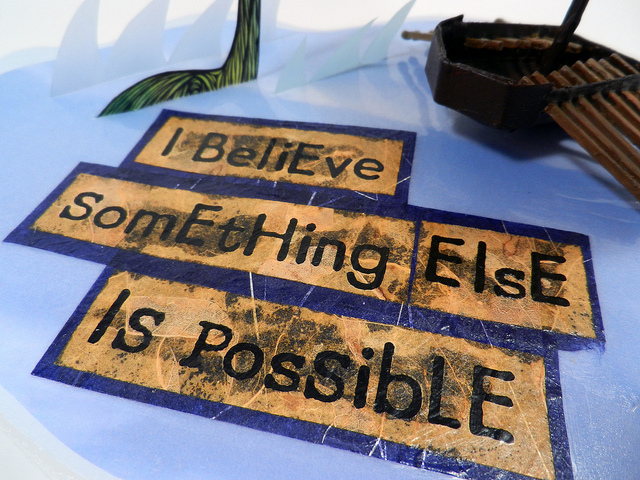
The Mod Podge made the orange paper a little transparent in some areas, but I think it looks good.
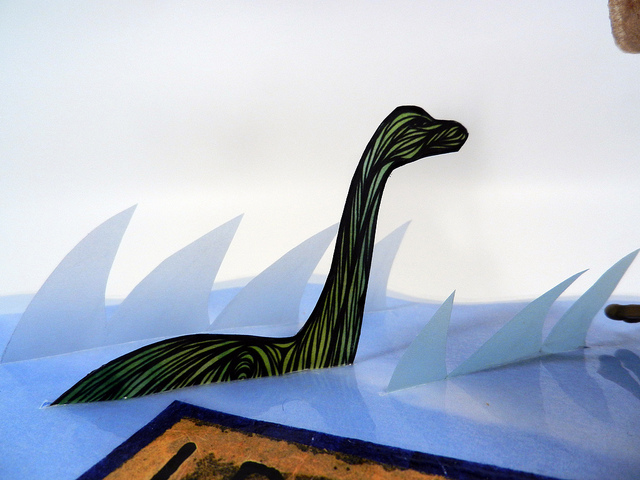
At this point, I really seriously wanted to be done, like really bad, but I put it all together and I just thought it didn’t look quite done yet. The sea looked too flat. So, I added a few waves to the sea using some colored vellum paper. I cut the shapes out for the waves, then carefully cut slots for them in the sea so they stuck out perpendicular like Champy.
That was it! I was done! I glued the sea to the base, and then sat back and basked in it’s glory. My three day adventure (the glue and the waiting!) constructing this piece had come to an end!
This piece will be auctioned off with about 200 other matchbox masterpieces this Friday at the 2013 Matchbox Gala in Boulder, CO. I hope it gets some bids!
Now to carefully pack it up and get it to Boulder by Friday. Yikes!
I am in awe of your piece and your process and your words to describe it. I don’t know if we will be able to thank you in person this Friday, so I want to thank you now, for this beautiful expression of your support! Can’t wait to see this little ship!
with sincere warmth!
Sue